
はじめに
今回SpringフレームワークでRestAPIを作成し、
Vue.jsでデータを表示させることをゴールに記載していきます。
(Javaのインストール等の初期設定となる環境構築は省きます。)
プロジェクト作成
Vue.js
①VueCliをnpmよりインストールする
npm install -g @vue-cli
②プロジェクト作成
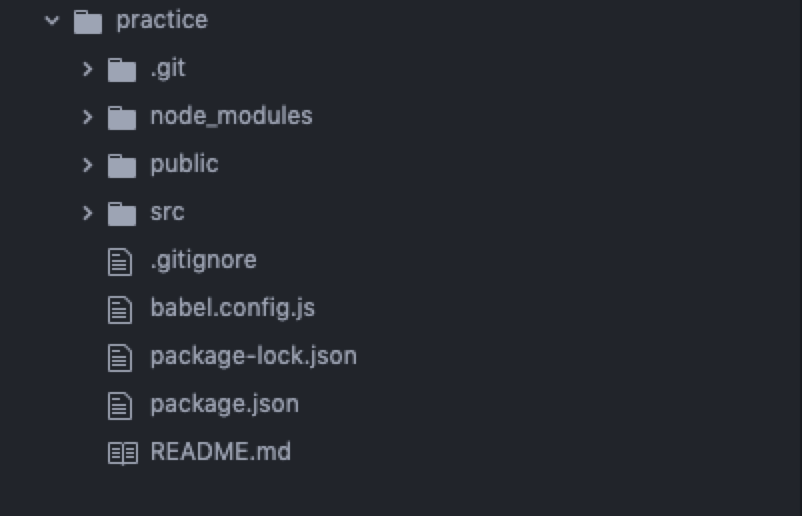
vue create practice
実行すると、アプリケーション作成に必要な設定ファイルやサンプルソースが自動で作成されます。
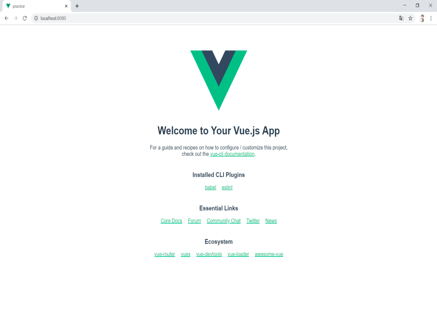
③サンプル画面確認
作成したプロジェクト配下にて以下実行し、localhostへアクセスすると表示されます
npm run serve
Spring
「Spring Tools for Eclipse」を使用して、進めていきます。
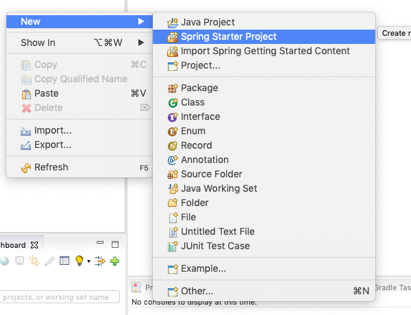
①プロジェクト作成
「Spring Starter Project」を選択肢プロジェクトを作成する
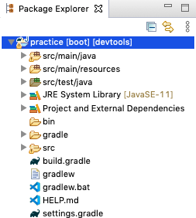
プロジェクトを作成すると以下のようなフォルダ、ファイルが作成されます。
(今回は「gradle」を使用しております。)
APIの作成
H2データベースからデータを取得するAPIを作成します。
①H2データベース準備
H2データベースとは・・・・・
JAVAプラットフォーム上でオープンソースのRDB
「インメモリデータベース」として使用が可能でSpring bootではデフォルトで付属されているため複雑な設定不要
以下のJDBCドライバがすでに登録されている

今回は「インメモリデータベース」として使用するため、初期化するテーブル、データを作成していきます。
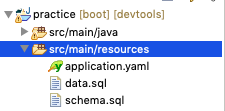
「src/main/resources」配下に「data.sql」、「schema.sql」を配置する。
アプリ起動時、インメモリデータベースのため毎回初期化されます。
初期化時には2つのSQLが自動で実行されます。
INSERT INTO person(code, name, belong_nm)
VALUES('001', 'テスト1', '総務部');
INSERT INTO person(code, name, belong_nm)
VALUES('002', 'テスト2', '人事部');
CREATE TABLE person
(
   id INT NOT NULL AUTO_INCREMENT,
   code VARCHAR(100) NOT NULL,
   name VARCHAR(100) NOT NULL,
   belong_nm VARCHAR(500) NOT NULL,
   PRIMARY KEY(id)
);
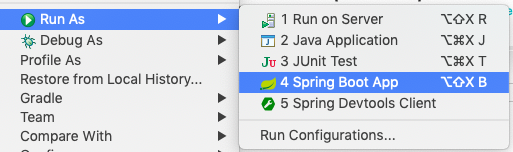
プロジェクト上で右クリックし、「Spring Boot App」にて起動する
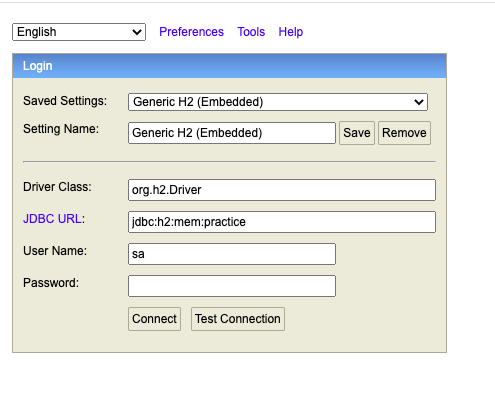
起動後「http://localhost:8080/h2-console」
にアクセスし、テーブルが作成されていることを確認
Connectを選択
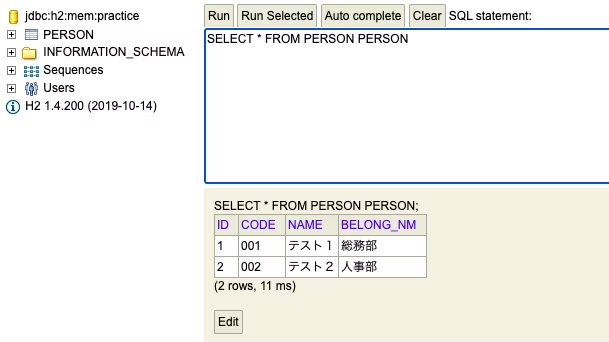
テーブルもデータも作成されている。
②Controller、Serviceを作成する
ControllerからServiceを呼び出します。
一旦DBの参照は行わず、固定の値を戻すようにする。
固定値をListに詰めて返却します。
package com.example.demo.service;

import java.util.ArrayList;
import java.util.List;

import org.springframework.stereotype.Service;

@Service
public class PracticeServiceImp implements PracticeService {

    @Override
    public List<String> getAll() {
        List<String> list = new ArrayList<>();

        list.add("1");
        list.add("2");
        list.add("3");

        return list;
    }
}
Service呼び、取得した値をListに詰めて、返却します。
package com.example.demo.controller;

import java.util.List;

import org.springframework.beans.factory.annotation.Autowired;
import org.springframework.web.bind.annotation.GetMapping;
import org.springframework.web.bind.annotation.RequestMapping;
import org.springframework.web.bind.annotation.RestController;

import com.example.demo.service.PracticeService;
import com.example.demo.service.PracticeServiceImp;

@RestController
@RequestMapping("api/practice")
public class PracticeController {

    private final PracticeService practiceService;

    @Autowired
    public PracticeController(PracticeServiceImp practiceService){
        this.practiceService = practiceService;
    }

    @GetMapping
    public List<String> getAll() {
        List<String> list = practiceService.getAll();

        return list;
    }
}
実際に実行し確認していきます。
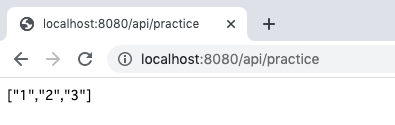
「http://localhost:8080/api/practice」
にアクセスし、固定値が表示されました。
③DBから取得した値をFormクラスに格納し、returnするよう修正
DBとの接続、SQLの発行はDAOクラスに任せます。
「Controller(リクエスト、レスポンスのハンドリング)」「Service(ロジック)」「Dao(DB操作)」という役割です。
package com.example.demo.service;

import java.util.List;

import org.springframework.beans.factory.annotation.Autowired;
import org.springframework.stereotype.Service;

import com.example.demo.dao.PracticeDao;
import com.example.demo.form.PracticeForm;

@Service
public class PracticeServiceImp implements PracticeService {

    private final PracticeDao dao;

    @Autowired
    public PracticeServiceImp(PracticeDao dao) {
        this.dao = dao;
    }
    @Override
    public List<PracticeForm> getAll() {
//      List<PracticeForm> list = new ArrayList<>();
//
//        list.add("1");
//        list.add("2");
//        list.add("3");
        return dao.getAll();
    }
}
package com.example.demo.controller;

import java.util.List;

import org.springframework.beans.factory.annotation.Autowired;
import org.springframework.web.bind.annotation.CrossOrigin;
import org.springframework.web.bind.annotation.GetMapping;
import org.springframework.web.bind.annotation.RequestMapping;
import org.springframework.web.bind.annotation.RestController;

import com.example.demo.form.PracticeForm;
import com.example.demo.service.PracticeService;
import com.example.demo.service.PracticeServiceImp;

@RestController
@RequestMapping("api/practice")
@CrossOrigin(origins = {"http://localhost:8081"})
public class PracticeController {

    private final PracticeService practiceService;

    @Autowired
    public PracticeController(PracticeServiceImp practiceService){
        this.practiceService = practiceService;
    }

    @GetMapping
    public List<PracticeForm> getAll() {
        List<PracticeForm> list = practiceService.getAll();

        return list;
    }
}
データを格納するための新規ファイル
package com.example.demo.form;

import javax.validation.constraints.NotNull;

public class PracticeForm {
    public PracticeForm() {};

    public PracticeForm(int id, String code, String name, String belong_nm) {
        super();
        this.id = id;
        this.code = code;
        this.name = name;
        this.belong_nm = belong_nm;
    }

    @NotNull
    private int id;

    @NotNull
    private String code;

    @NotNull
    private String name;

    @NotNull
    private String belong_nm;

    public int getId() {
        return id;
    }

    public void setId(int id) {
        this.id = id;
    }

    public String getCode() {
        return code;
    }

    public void setCode(String code) {
        this.code = code;
    }

    public String getName() {
        return name;
    }

    public void setName(String name) {
        this.name = name;
    }

    public String getBelong_nm() {
        return belong_nm;
    }

    public void setBelong_nm(String belong_nm) {
        this.belong_nm = belong_nm;
    }

}
DB操作するための新規ファイル
package com.example.demo.dao;

import java.util.ArrayList;
import java.util.List;
import java.util.Map;

import org.springframework.beans.factory.annotation.Autowired;
import org.springframework.jdbc.core.JdbcTemplate;
import org.springframework.stereotype.Repository;

import com.example.demo.form.PracticeForm;

@Repository
public class PracticeDaoImp implements PracticeDao {

    private final JdbcTemplate jdbcTemplate;

    @Autowired
    public PracticeDaoImp(JdbcTemplate jdbcTemplate) {
        this.jdbcTemplate = jdbcTemplate;
    }

    @Override
    public List<PracticeForm> getAll() {
        // TODO Auto-generated method stub
        String sql = "select id, code, name, belong_nm from person";
        List<Map<String, Object>> resultList =  jdbcTemplate.queryForList(sql);
        List<PracticeForm> list = new ArrayList<PracticeForm>();
        for(Map<String, Object> result : resultList) {
            PracticeForm practiceForm = new PracticeForm();
            practiceForm.setId((int)result.get("id"));
            practiceForm.setCode((String)result.get("code"));
            practiceForm.setName((String)result.get("name"));
            practiceForm.setBelong_nm((String)result.get("belong_nm"));
            list.add(practiceForm);
        }
        return list;
    }

}
上記修正後、サイドアクセスしてみます。

DBの値が取得できております。
Vue.jsからAPIを実行
フロントエンド側からAPIを呼び出しデータを表示させます。
①axiosをインストール
APIを実行するために「axios」を使用します。
axios:HTTP通信が可能なJavaScriptのライブラリ
npm install --save axios
②axiosでAPIを呼び出す。
※VueもSpringもサーバーを起動させておく。
axiosにて、APIのURLを指定しデータを取得する。
// Home.vue
<template>
  <div>
    {{ people }}
  </div>
</template>

<script>
import axios from 'axios'
export default {
  data () {
    return {
      people: []
    }
  },
  methods: {
    getPerson () {
      const path = 'http://localhost:8080/api/practice'
      axios.get(path)
        .then(response => {
          this.people = response.data
        })
        .catch(error => {
          console.log(error)
        })
    }
  },
  created () {
    this.getPerson()
  }
}
</script>
画面を確認する。

データが取得されました。
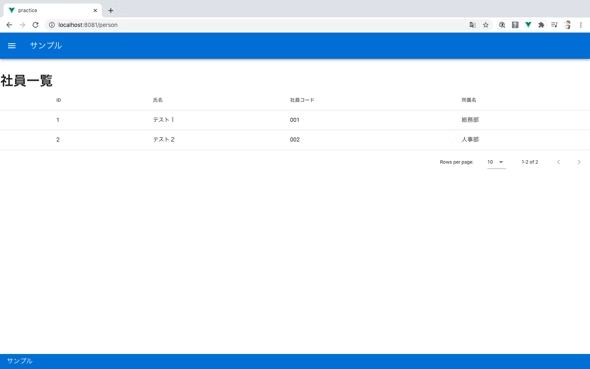
③テーブルに表示させる
UIフレームワーク「vuetify」のデータテーブルを用いて、画面をそれっぽく加工してみます
// Person.vue
<template>
  <div>
    <h1>社員一覧</h1>
    <v-data-table
          :headers="headers"
          :items="people">
    </v-data-table>
  </div>
</template>

<script>
import axios from 'axios'
export default {
  components:{

  },
  data () {
    return {
      people: [],
      singleSelect: false,
        selected: [],
        headers: [
          {
            align: 'start',
            sortable: false,
          },
          { text: 'ID', value: 'id' },
          { text: '氏名', value: 'name' },
          { text: '社員コード', value: 'code' },
          { text: '所属名', value: 'belong_nm' },
        ],
    }
  },
  methods: {
    getPerson () {
      const path = 'http://localhost:8080/api/practice'
      axios.get(path)
        .then(response => {
          this.people = response.data
        })
        .catch(error => {
          console.log(error)
        })
    }
  },
  created () {
    this.getPerson()
  }
}
</script>
データテーブルを使って表示させることで、簡単にそれっぽいものが表示されました。
まとめ
簡単なAPIを作成しそれをフロントエンドと連携させることができました。
いまどきのフレームワークのおかげでどこにどういうロジックを書くかがだいたい決まっております。
そのため、役割もはっきりし便利ですね。
参考文献